Blockchain with Typescript part I— source code included
The crucial part of understanding how some technology, tool, or invention works is to know it so well, to be able to clearly explain it to…
The crucial part of understanding how some technology, tool, or invention works is to know it so well, to be able to clearly explain it to a kid or grandmother.
When it comes to learning such a complex and breakthrough technology as a blockchain, it can be unbelievably beneficial to build it from scratch with a favourite programming language.
Nobody claims, that it should be a new ethereum or bitcoin ecosystem, just simple proof of your knowledge about web3. Including very fundamental structures and cryptographic solutions is the key of a successful project.
It is worth to mention, that implementing consensus model as presented proof-of-work in tutorial, can easily verify the most essential part of decentralised ledger, called blockchain.
This is the reason, why “the blockchain with typescript” tutorial was created. Showing that blockchain is not extremely difficult to build and challenging those who claim that they know it very well, to make it on their own, is a perfect way for mastering that amazing technology.
The entire API part can be found in the repo linked below:
Code for a frontend part which will be included in next parts, as a great visualisation is pushed in the following repository:
Keep in note, that these projects are constantly developed, there will be attached new features, like proof-of-stake, smart contracts, etc.
If you feel like you are capable of sharing your experience and effort in these code bases, do not hesitate, just contribute and give a value.
Why typescript?

Implementing blockchain in typeScript, instead of javascript is a little more challenging, but very beneficial. Typescript is commonly called “HypeScript”, because it has all javascript functionalities and static typing added on top of that. Describing types of variables is a very good practice, which prevents sacrificing time for debugging. JavaScript is not static typing programming language, so that the code written in this language is vulnerable.
Since AirBnB switched their javaScript source code into typeScript, they avoid 38% bugs, according to postmortem analysis. Let’s leave that sentence as a statement, why typeScript is so beneficial.
Agenda for this tutorial:
It is the very first part of the tutorial, which focuses on fundamental elements, needed to even starting building the project.
- What all parts of tutorial do include?
- Basic setup,
- Installing necessary packages,
- Index.ts setup,
- API config,
Initialising blockchain:
- Blockchain class,
- Block class,
Additional routing:
- Adding a new block,
- Getting status of a blockchain,
Testing endpoints
Conclusion
Basic Setup
Code from this part of tutorial is available in a ‘setup’ branch, link is presented below:
Creating this project has to be started with initialising code base. Entire blockchain will be written in typescript and node, so one of the very first steps are:
- installing node.js:
Use official link below to download and install it.
https://nodejs.org/en/download/
- initialising node project:

Setup of node.js package.json is proceeded, by using below command. Flag “-y” highlights, that we approve all the defaults.
npm init -y- installing typescript:
npm install typescript --save-dev- installing node.js types for typescript
This step is necessary to have correct auto-completion on the node apis
npm install @types/node --save-dev- creating tsconfig.json
npx tsc --init --rootDir src --outDir build \
--esModuleInterop --resolveJsonModule --lib es6 \
--module commonjs --allowJs true --noImplicitAny true
At this point, new tsconfig.json file will be generated in a codebase, looking like below:
It is commonly known, that usually projects do not need all the dependencies and especially commented lines. The same situation is in blockchain with typescript project, after deleting obsolete lines, tsconfig.json file will look like below:
This project requires a minimum setup which is demanded to achieve final result.
- initialising GIT repository

In project direction, execute below command:git init
- adding source direction
One of the lasts, but not least step for finishing “a setup part” is creating source direction with main index.ts file. It can be done by terminal, or manually.
mkdir src
touch src/index.ts
For now, this file will be left empty. Configuration will be proceeded after installing necessary packages.
- compiling typescript
Proceeding the compiling of typescript files requires a command tsc using npx, the Node package executer. It works basically like reading tsconfig.json in the current directory. Then after applying the configuration, the Typescript compiler generates JavaScript code.
npx tscCompiled code can be previewed in “build/index.js” directory.
- further configurations & scripts
vscode

Below is presented settings.json file in ./vscode directory. It is a little help for developing a code. Enabling word wrap, automatically executing prettier on save or on paste and colorising brackets are making coding process more smooth and enjoyable.
scripts
This is the right moment for implementing basic scripts needed for running and building the project. Below is attached fragment of package.json file, which defines commands for this project.
Adding simple “start” and “build” commands is a more friendly solution than typing each time compatible, long scripts.
installing necessary packages

Below is presented package.json file with a configuration needed to build this application. Required packages can be found in “devDependencies” and “dependencies” part.
package.json
It is demanded to have the same versions of installed modules, so that it can be prevented from appearing of different bugs.
The easiest way of installing these listed packages, is to copy below fragment of a file, pasting it in yours package.json and running command:
npm installThe other way is to manually run installation of each lacking package, just go through them and run a command which is structured like:
npm i package@versionpackage is the package name and version is the number, example:
npm i body-parser@1.20.0index.ts setup
Basic setup of index.ts should look like code snippet presented below:
This is just the very fundamental execution of an express app. There is also added in this step, bodyParser function which will be necessary to setup correctly responses and requests.
After running the command:
npm startNode app will run and display console.log attached in 15th line, informing user, which port is active.
log in the terminal:listening on port 3001
As it can be saw, variable HTTP_PORT has a value of 3001 by default, because there are no env variables declared in the project. However, it is a very good habit to execute, which allows to quickly go through production.
In case of getting some variables, it is necessary to configure routes and get requests. It is included in the next chapters.
API config
This project was created to not only show, fundamentals of blockchain technology, but also code it in the most professional way possible, with good practices.
That is why, routing and configuration of an API is made for production. It is made in few steps:
- creating /config direction
In src folder, create /config direction, which will consists two files:
config.ts
This file process env variables and creates SERVER object, which includes HOSTNAME and PORT. It is a very good practice, which enables easy development for production.
For testing, backend service will be working on localhost:1338, but in production it will take arguments from envs.
logging.ts
Logging will be extremely helpful while working on requests and debugging them. Terminal will indicate timestamp, http request method and returned messages, errors.
All declared functions will be implemented in main index.ts file.
Right now, src directory looks like following:-/src
|
- /config
|
config.ts
logging.ts
- adding controllers
First controller will just check the connection and send a message that server works correctly.
It is implemented like in standard javaScript, but with added types to arguments. Types are imported from ‘express’.
- making routes
Creating correct routing, requires adding new folder /routes in /src directory and implementing inside index.ts file, presented below:
Current code is just proceeding /check route, which runs http get method. It causes the returned message:server running ok
…according to controllers.
Updated source directory looks like:-/src
|
- /config
| |
| config.ts
| logging.ts
|
- /controllers
| |
| index.ts
|
- /routes
| |
| index.ts
|
- index.ts
- updating index.ts file
Basic setup of API changed a little the logic of entire service, so the last step of configurations is to update index.ts file and display server health status.
Updated index.ts file includes a lot of changes and new features.
There is added cors middleware to handle errors connected with cross-origin-policy. Current setting enables GET, POST and PUT requests from any origin.
There is also implemented logging from declared earlier file. It basically, logs the status of http requests.
Such a configuration of loggs causes messages on terminal like following:
- for ‘/api/check’ request[2022–09–17T09:00:37.627Z] [info] [Server] METHOD — [GET], URL — [/api/check], IP -[::1]
[2022–09–17T09:00:37.628Z] [info] [Server] METHOD — [GET], URL — [/check], IP — [::1], STATUS — [200]
Thanks to that loggs, it is known that route works correctly and when it happened.
Adding to bodyParser line of url encoded property, set to extended false is the trick which prevents error 415, caused by unsupported encoding.
Routes are implemented in ‘/api’ url, what means, that declared heathcheck is executed not on ‘localhost:1338/check’ url, but ‘localhost:1338/api/check’. Following line of code is the source of that logic:
Error handling is made by simple function, which indicates error messages for status 404 not found.
The last, but not least change is using http modules to “listen” active port. Previously it was made directly from ‘app.listen’ function, but more advanced and clean solution is to proceed it in the following way:
Initialising the blockchain

Implemented blockchain with typescript, is build using classes. This way of coding is called OOP (object oriented programming). It is one of the most famous ways of developing software.
OOP is not the easiest way of programming, but it is very efficient and what is worth to mention, boosts basic skills of every developer.
API of the project contains multiple classes, but let be focused on two most fundamental: Blockchain and block classes.
To build own blockchain correctly, it is extremely important to look at this as a big construction made from toy blocks. This example literally indicates, that it should be started by creating a single block, by making its structure and detail what it will include and how it be created.
To make easy start, in next step will be shown the path of creating block class, then entire blockchain.
Block class
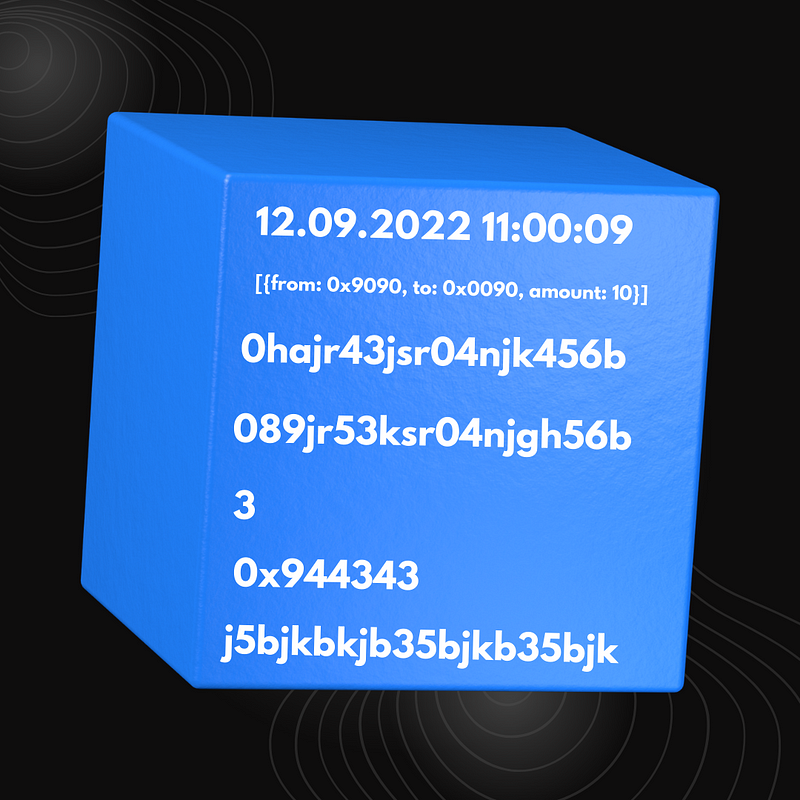
Implementing Block class requires basic knowledge of how it is structured. Every block in a very fundamental ecosystem should contain data like:
- timestamp,
- transactions,
- previous hash,
- hash,
- nonce,
- validator,
- signature.
Practically, all this details can be acquired by simple declaration. However, adding hash requires special hashing function, one of them which will be used is sha256. Fortunately, there is a package crypto-js which provides it.
In typescript, it is necessary to declare proper types of props, arguments, fields, etc. Below is presented imported hash function and proper interface for Block class:
All listed fields have defined type, for example timestamp has to be always a string, the same with a hash, transactions are described as an array of any kind of data, nonce is a number, etc.
Moreover, there is also included a method ‘toString()’ which returns string variable, extremely useful in handling block data across entire blockchain.
Continuing the block structure, it should be made by implementing the interface and create constructor, which is a special method, executed every time, class is initiated.
Above constructor sets fields to concrete values passed during initialisation of a class. Only nonce is left to be zero, just for current implementation.
Next step is to add method toString, declared in the interface. It is a very simple function, which stringifies data included in a single block.
Missing parts of the block class are:
- creating genesis block (the first in a chain),
- generating hash,
- creating new block.
All this features are achieved, by static methods.
Static methods differs from classic methods fact, that they can affect other objects, not only the one within it is initiated.
It is found a very helpful feature, especially in creating hashes, because they affect on previous blocks, by connecting with them. Hash of the previous block has to be equal of previous hash data in a new block.
It will be perfectly shown in further steps.
Below are presented created static methods:
genesis static method returns initiated object with arguments presented in a code snippets, mainly:
- timestamp: ‘genesis time’,
- transactions: [‘genesis block’],
- previous hash: ‘genesis block’ — as it is the first block, it do not have to includes specific data,
- hash: this.hash(`genesis time,’’, []) — it uses another static method within the class, to generate hash from this values.
- nonce:1,
- validator: ‘genesis block’ — first block does not requires validator,
- signature: ‘genesis block’ — the same like above.
Static method for hashing was introduced in previous example, it takes as arguments: timestamp, lastHash and dataThen returns the hash, which is generated from SHA256 algorithm.
Creating new block is defined in next static method called ‘createBlock’. It takes as an argument lastBlock and data. Inside the method is generated new hash, timestamp and initialised block class with declared arguments as a returned value. This method will be important in proceeding transactions and adding new parts of the chain.
The last, but not least method is a blockHash function, it takes block as an argument and uses hash method to get hash from the passed block. It will be used in further steps.
Entire block.ts file should contain code presented below, and be placed in src directory.
Correct exporting of modules, enables to use the class in blockchain.ts file, which is created in next chapter.
Blockchain class

After defining the most basic part of blockchain, which is a single block, it is possible to maintain entire network.
It is a good practice to consider which variables will be used and what types are they. From the very basic knowledge of decentralised ledgers, it is easy to claim, that blockchain class should have chain data, which type will be declared as any, to prevent bugs at the start. The type should be restricted as soon as it will be known which to attach.
Constructor in this class is just adding to chain array a new genesis block.
Needed methods will be: ‘addBlock’ and ‘isValidChain’. Both of them will take arguments of type any and return types any for addBlock and boolean for validation.

It can be saw, that adding block basis on Block class method, ‘createBlock’. Taking as arguments last block , by array of chain and passing data passed to this function, as a result pushes new component to the chain array.
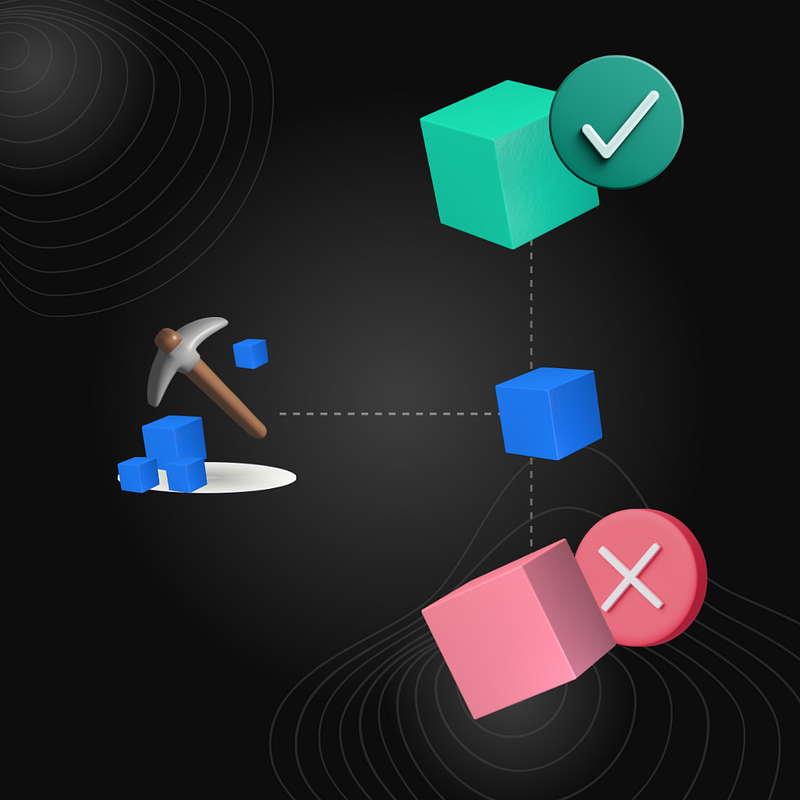
Every blockchain needs proper validation, to not add some unwanted blocks to the ecosystem. In this case, the very simple validation can be achieved, by:
- firstly, comparing first blocks of chain, genesis block is unique, if passed chain has the first element different, it does not make sense checking further blocks.
- secondly, the rest of the blocks are iterated in for loop, just to check if hashes are compatible, last hash of next block, should be equal to the hash of the previous one.
Entire blockchain class should look like following example:
The last implementations included in this part of the tutorial are two very fundamental requests, which use Block and Blockchain classes. This requests will be added in routing, mainly they are:
- adding new block to the network,
- getting status of the blockchain.
Additional Routing

Last steps will show the first functional parts of the newly created blockchain. According to created classes and their methods, it is possible to create get requests for receiving informations of blocks included in chain and post request for adding new block.
Getting status of a blockchain
Firstly, it is demanded to add new endpoints in /controllers/index.ts file. Below serverHealthcheck, should be placed short endpoint ‘blockStatus’.
Endpoint returns chain array from Blockchain object.
Adding a new block
Adding blocks is proceeded with post request method, so that endpoint should take arguments from body of a request and use blockchain’s addBlock method to create new block. As a response is returned newly created block.
It is worth of mentioning, that new endpoints should be exported by default from the file, to use them in routing.
Routing
In routes/index.ts directory, just add latest exported endpoints and attach to them api url. As it can be saw, blockchain status is gotten from /api/blocks url and adding block is at /api/mine.
Update of controllers
One last step is to initialise Blockchain object inside /controllers/index.ts, so that it can be possible to make requests using blockchain methods and fields. Complete file is attached below:
Testing endpoints
Get requests can be directly checked in a browser, typing in url bar set localhost:1338/api/blocks will show the genesis block data. However, post requests, require some tools to attach the body of the requests. To proceed that, this tutorial will show extremely easy extension available in vscode — thunderclient.
Link available below:

After successful installation of above extension, open it and get ready for the first post request.
Set method for POST at the left side of the url input and type correct url, for new block it is ‘/api/mine’. As it is a post request, it is required to send the body, in this case it is a JSON with data of the block. Just for current use case, it contains only a string “test block”.
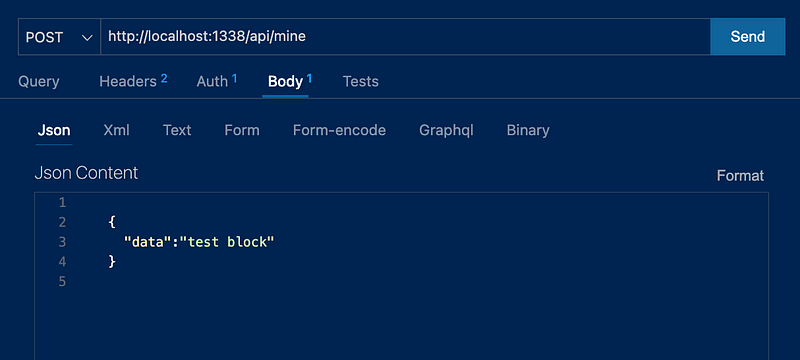
It can be saw, that response contain timestamp and hashes of a new block. There are no validators and signatures yet. It will be completed after creating transactions with a crypto wallet. Stay toon and wait for the second part of the tutorial.

Below are also presented logs from the terminal:[2022–09–18T19:28:04.738Z] [info] [Server] METHOD — [POST], URL — [/api/mine], IP -[::ffff:127.0.0.1]
New block added: Block —
Timestamp : 1663529284756
Last Hash : 53e6466e1ab65622b6afb0cf5ae9fd41bae6f5591871480184893b62a8f9fc5e
Hash : d8e35f002c5dd1f5e2005242a7f610d47a8224aa3f642027202b195d080f2853
Data :
Validator :
Signature :
[2022–09–18T19:28:04.757Z] [info] [Server] METHOD — [POST], URL — [/mine], IP — [::ffff:127.0.0.1], STATUS — [200]
Conclusion
Blockchain is the most innovative technology since the Internet revolution. This distributed, decentralised ledger gives a lot of possibilities, which are not even discovered. Every year there are found different solutions, achieved by decentralisation. Getting know this technology, especially at the very beginnings, can be very beneficial.
It is not only about some speculations on a crypto market, but mainly about new softwares, solutions, which can change the world and provide a value to the humanity.
This tutorial teaches the very basic theory in a practical way, what is considered as one of the most efficient ways of learning new stuff. Implementations of every detail in the beloved programming language, shows how the complex technology such as blockchain works and can reveal new perspectives for developing it.
Next parts include implementations of wallets, crypto keys, transactions and especially, the visualisations made in React.ts.
If you want to know more about web3, blockchain and decentralisation, follow repository from 100 days of web3 challenge: